Yes, it’s happened again. There they were looking fresh, yellow and appealing and overnight they turned from innocent fruit in to guilty, squashy criminals that could not be tolerated.
This my friends is another classic case of what happens when good bananas go bad…
One solution was to make banana loaf, which is indeed a noble answer but I really do think I have come up with the best solution ever, so prepare yourselves for …
When good bananas go bad – the sequel.
Banoffee Soufflé, yes get very excited. This is honestly one of the easiest and best dishes I have come up with and I cannot recommend it highly enough
All you need isFor the soufflé:
2 medium bananas, mashed with a little lemon juice
4 egg whites
110g/4ozs caster sugar
Butter to grease the dishes and icing sugar for dusting
For the toffee sauce:
100g unsalted butter
150g dark soft brown sugar
125ml double cream
Seeds from a fresh vanilla pod or 1 teaspoon vanilla essence
Method:
Preheat your oven to Gas 6/Fan 180 non-fan 200
Generously butter 6 to 8 (depending on size) ramekins
Whisk the egg whites until they are stiff and leave peaks
Slowly add the sugar, bit by bit and whisk until really thick and shiny
Gently fold in the mashed banana with a metal spoon, taking care to keep as much air in as possible
Spoon the mixture in to the ramekins and then run either a knife or your finger round the edges (about finger nail width) so that they can rise
Pop them in the oven for 10 to 12 minutes or until they are well risen and browned
Whilst the soufflés are in the oven, make the sauce by melting the butter in a small saucepan over a low heat
Add the vanilla and brown sugar and stir for a few minutes until it has all combined and is lovely and thick
Stir in the double cream and it is ready to serve
Once your soufflés are ready, serve and then when they are at the table carefully make a hole in the top and pour some toffee sauce in to the centre reserving the rest for people to add as they wish. This is so easy and it also utterly delicious. Try it!
As you may know, amongst our friends are many keen cookery types but none more so than Richard 9pictured above) and Peter, and we take it in turns to go to each others houses to sample each others cooking. No don’t get me wrong here, this isn’t “Come dine with me”, we don’t use this as an excuse to rummage around each others’ knicker drawers, it really is all about the cooking, but no matter how nonchalantly we pretend we treat this, this is serious competition . This last time, we went to Richard and Lisa’s house. Richard is famous for his ability to smoke and preserve things, he’s the only person I know who has been on a foraging course and would know a wild mushroom from a deadly toadstool. So on this occasion, he didn’t disappoint and to follow, here were his divine recipes for duck rillette and rack of lamb. Lisa always cooks the dessert and this was absolutely delicious, and as below, recipe courtesy of James Martin.
Starter -Duck Rillettes.
A great evening starter or snack…..make it in lots of small jars as it keeps for weeks and can also be frozen.
Ingredients
4 duck legs
Rendered pork fat
1 bottle Cider
1 star anise
Salt and pepper
Mace
3 cloves
2 bay leaves
1 bulb of garlic
(Christmas cheat: use mulled cider and remove the star anise and mace from the ingredients)
Brown the duck legs in a pan.
Add all the remaining ingredients except the cider. Bring to a slow simmer.
Add the cider.
Cook on the hob (covered) on a low heat for 2 hours.
Remove the duck legs and strain the remaining liquid into a bowl through a sieve and retain.
Remove the meat from the bones making sure you shred it as much as you can with two forks.
While you have been removing the meat from the bones, the fat and sediments you retained will have settled with the fat on the top, and the juices and sediment at the bottom. Use a spoon to remove the fat keeping the sediment and the juices.
Combine the sediment, juices and meat in a bowl and mix by hand tasting and seasoning as you go.
Spoon into sterile jars.
Place the jars sealed into a pan of boiling water and place in an oven at 120 deg c for 20 mins.
Allow to cool and leave in the fridge for a few days before eating as it gets better with ageing (comment from Kim: unlike me!).
Serve with toasted brioches, pickle and sliced gherkins.
Main course –
Rack of lamb with haggis.
Most can be made in advance and heated up. A great winter warmer!
Ingredients.
Rack of lamb
Olive oil
Salt and pepper
Fresh rosemary (chopped)
Garlic (chopped)
Mashed potatoes
Mashed parsnip
Lamb stock
Mulled wine
Bramble and recurrent jelly
Port
Place the lamb, garlic and rosemary in a bag with some olive oil and leave it for 6 hours in the fridge.
Using a cooks ring place some haggis on the bottom layer, some parsnip in the middle and top with mashed potato make one per diner. Place in a pre heated oven (180 deg c) for 8 minutes. While this is baking brown the lamb on hob in a pan, then place into the oven for 12 minutes.
Then place the lamb on a board to rest for 10 mins, turn off the oven but leave the mash in to keep warm.
While the lamb is resting place the lamb pan on the hob and heat. De glaze with red wine add stock and port, reduce and finish with the bramble and recurrent jelly.
Plate up and enjoy!
Pudding – (Alas no photos, so here is the lovely Lisa instead!)
Chocolate fondants (serves 6)
(courtesy of James Martin, ‘Desserts’)
190g dark chocolate
100g butter
35g ground almonds
2 large eggs separated
35g cornflour
85g caster sugar
6 plain chocolate truffles
Berries to garnish
Pre heat oven to 180deg C.
Grate 40g of the chocolate. Rub half the butter over the inside of the dariole moulds, then dust with the grated chocolate. Put on a baking tray.
Melt the rest of the chocolate and butter in a bowl over a pan of simmering water, to melt. Scrape into a bigger bowl and add ground almonds, egg yolks and cornflour.
Whisk egg whites separately until they form stiff peaks, then beat in caster sugar. Fold the merringue into the chocolate mixture. Spoon half the mixture into the bottoms of the moulds, then add the truffles, then the rest of the mixture.
Bake for 10-15 mins until still squidgy to the touch on top…this is trial and error and depends on the heat of your oven, but you don’t really want to over cook it!!
Serve with berries and creme fraiche.
Thank you for the above, Richard. My turn next…oh dear, any suggestions anyone??
(Peter, I’m not ignoring you – but you haven’t sent me your recipes!)
Everyone knows that my favourite restaurant in the world is “The Waterside Inn” at Bray and that I have a bit of a pash for Alain Roux, who is not only a genius cook but one of the nicest people you will ever meet. His father of course is incomparable, but Alain has a much lighter touch and some of his new dishes are truly brilliant, But at the end of the day during my unforgettable cooking course at the Waterside, it was Alain who taught me how to fillet a Dover Sole and to make Italian meringue, so my heart stays with him.
Having seen father and son on “Saturday Morning Kitchen, which was pure entertainment in itself, I have been meaning to try the scallop mousse that Alain cooked on the show for ages. Having done this it was so easy and so delicious I really do urge you to try it. I changed the recipe very slightly (apologies Alain) but here’s my version, I also think this would be wonderful done with lobster or crab.
You will need 4 -6 small ramekins (those funny little ovenproof dishes) Ingredients: Enough butter to generously grease the dishes, 150g/5ozs scallops (white only no corals), 2 large eggs, 200m/7fl ozs double cream, pinch salt and some cayenne pepper. Alain used fresh herbs but I missed these out and used some of the asparagus ends lightly sauteed instead:To garnish: 25g/1oz butter, 150g fine asparagus, lemon juice and 4 large scallops (white only) (Alain made more of a sauce, I kept mine a little simpler)
Preheat the oven to 160C/325F/Gas 3.
Grease the ramekin dishes generously with the butter
Lightly saute the ends of the asparagus
Place them at the bottom of the greased ramekins
Blend the scallops and eggs in a food processor for one minute or until smooth. Add the cream, salt and cayenne pepper and blend for a further minute.
Divide the mousse mixture evenly between the ramekins and cover each ramekin with aluminium foil.
Place the ramekins in a roasting tray and add enough boiling water to come half way up the sides.
Place into the oven and cook for about 20-25 minutes. A skewer should come out cleanly
Heat the butter in a frying pan and cook the scallops on high for a couple of minutes until they are slightly browned on the outside but still tender inside – don’t overcook!
Remove from the pan and toss the cooked asparagus in the butter until it is warmed through, drizzle lemon juice over the top
Remove the foil from the ramekins, loosen the timbales with a small knife and turn each one out onto a warm plate.
Place slices of scallop on the side, along with the asparagus spears and any remaining butter.
Due warning though Waterside, our lovely friends Helen and Joe are taking me to Alain Ducasse at the Dorchester this week – you have come out top against other Michelin starred venues I’ve visited – will you still be triumphant after Thursday? Watch this space
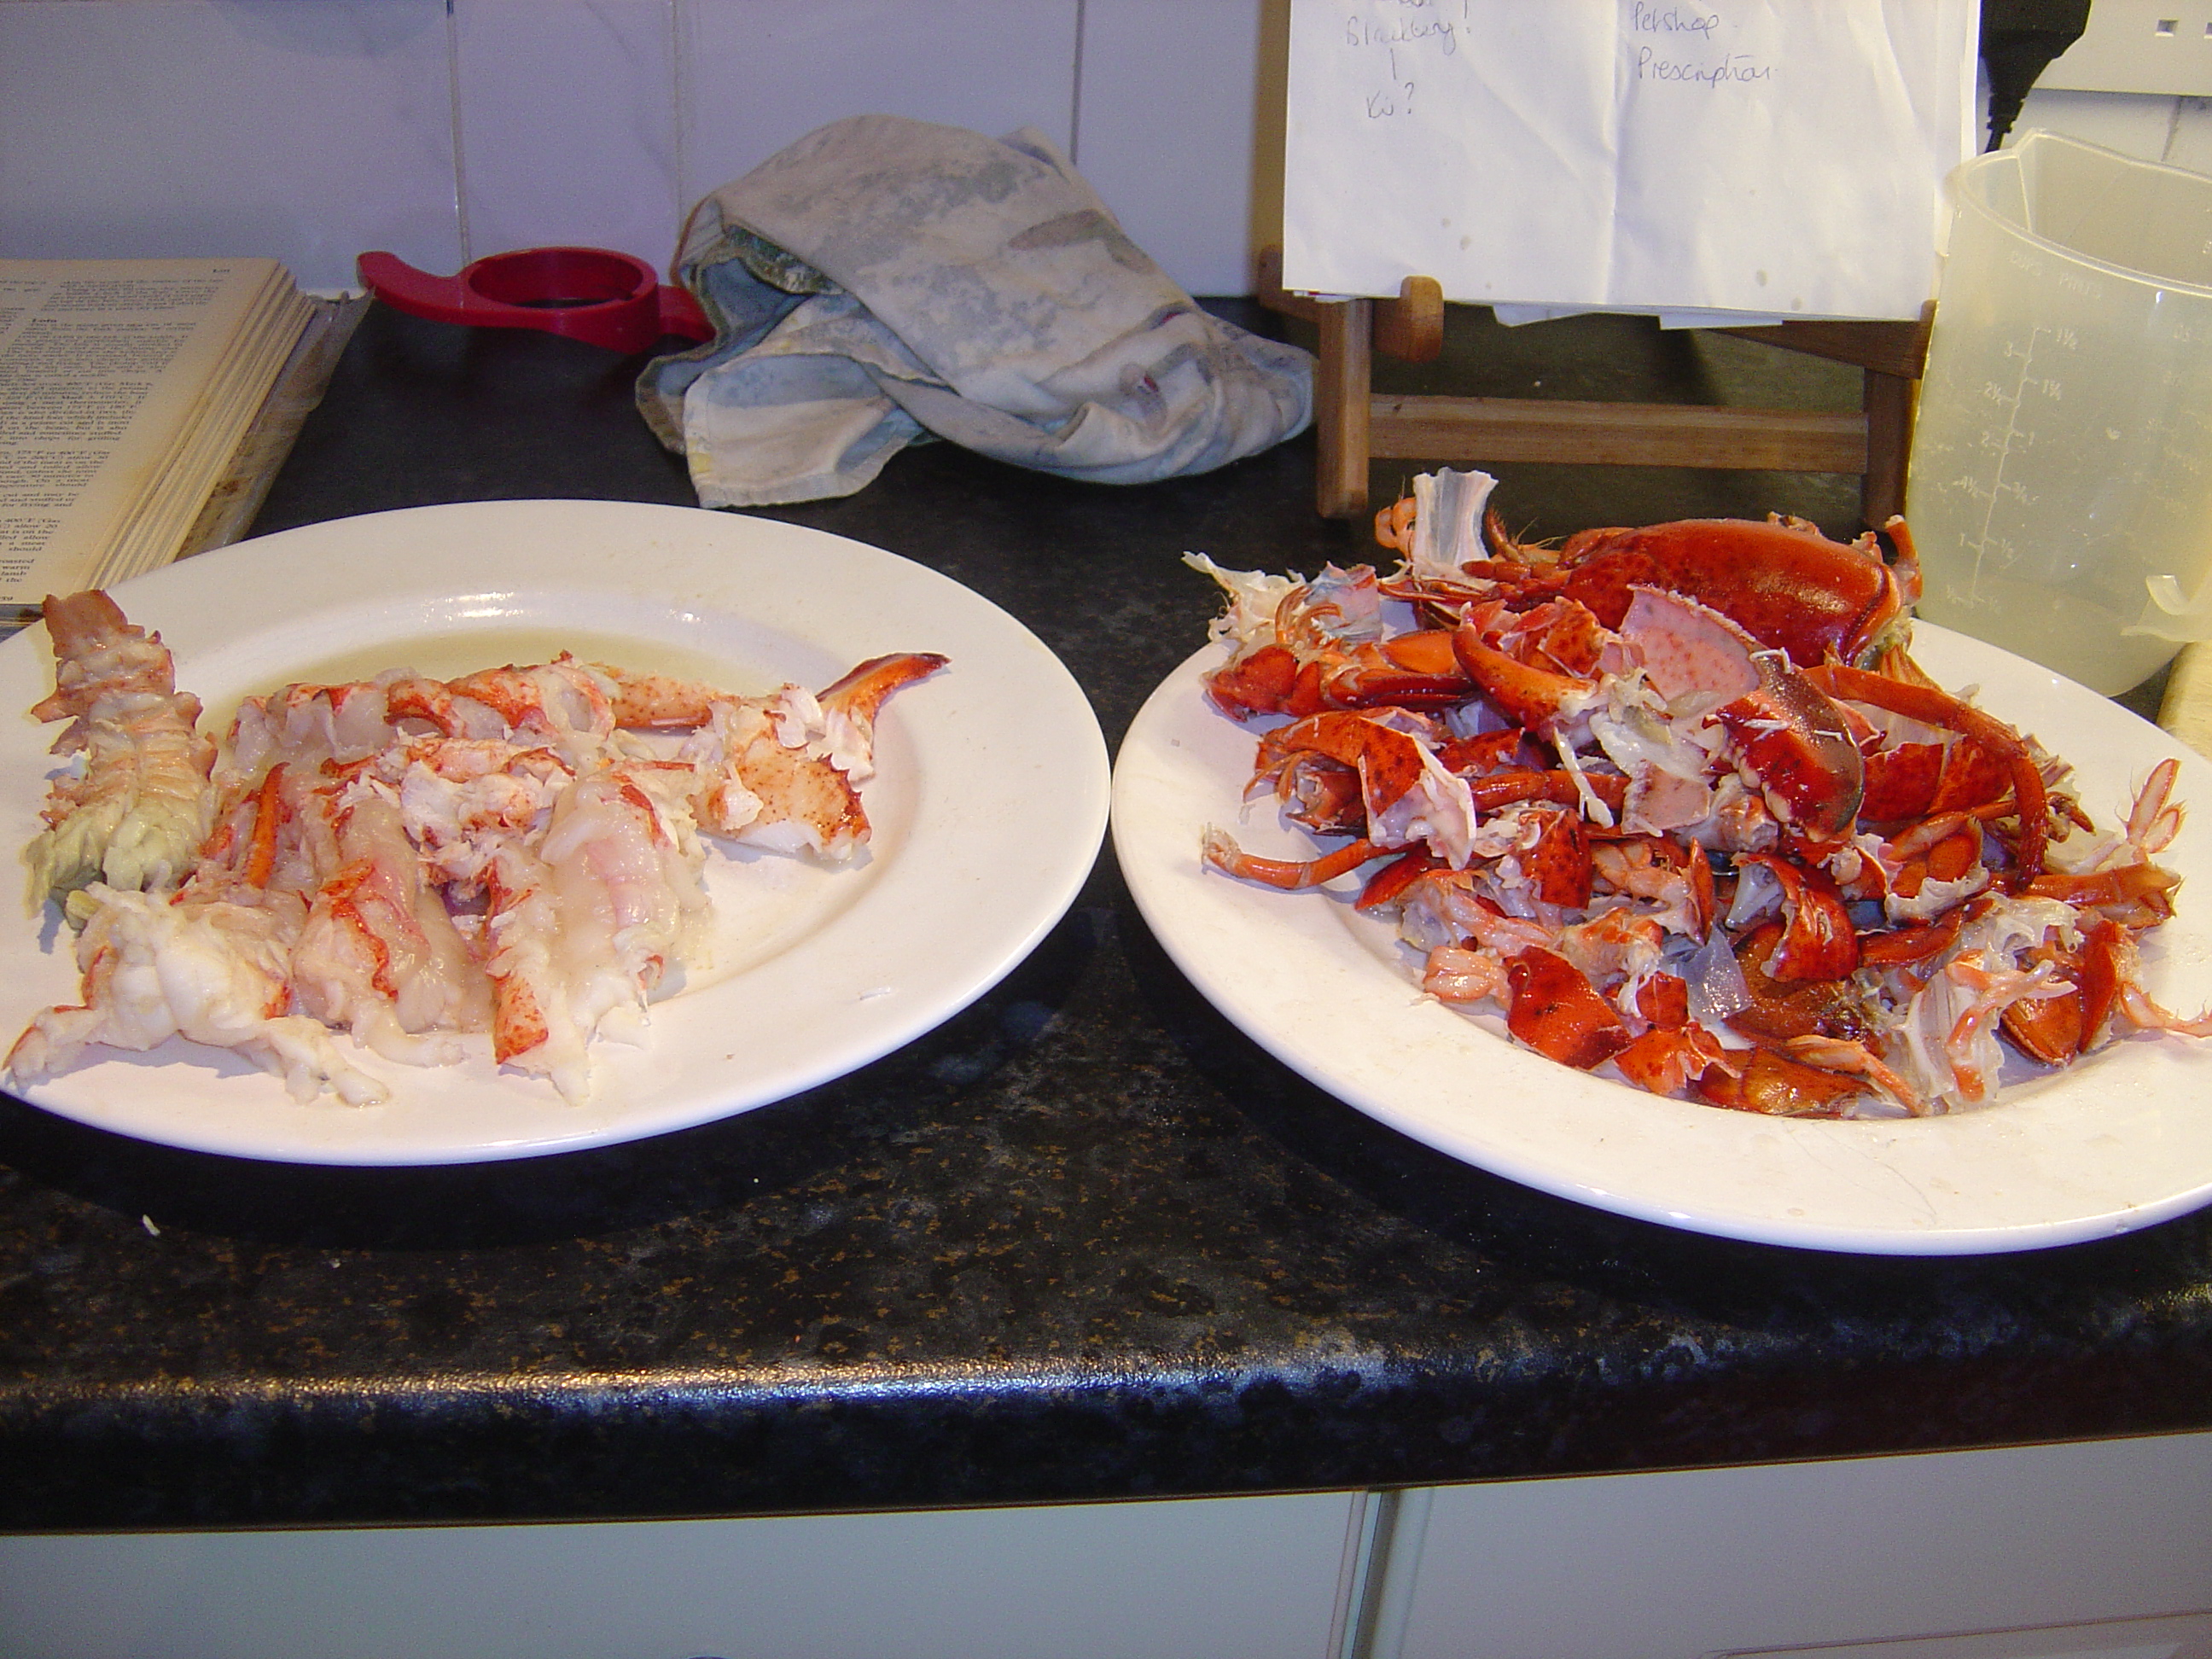
Who doesn’t love lobster (Ok Josh, I know you don’t, but you’re fish-phobic which is different). Ellie, clearly does. She and I had a thoroughly enjoyable Saturday afternoon, creating a variation on a classic lobster thermidor which involved lots of claw cracking and flambeeing which was terrific fun ( pyromania and crustaceans combined, what’s not to love?). This recipe will serve four people for a generous starter or a light lunch with salad and bread. I have to admit the result was completely delicious, here’s how we did it if you want to give it a try. You will need:
1 ready cooked lobster and 4 uncooked lobster tails (actually this was all we could get that day, so improvise if you wish!)
10fl ozs of dry white wine
10fl ozs of fish stock
75ml brandy
1/4 teaspoon of dried chervil
1 tablespoon of chopped fresh tarragon (1/2 teaspoon dried),
1 tablespoon of chopped fresh parsley
2 small shallots, finely chopped,
50g butter
2 teaspoons of vegetable oil
5 fl ozs double cream
1 teaspoon of wholegrain mustard
salt and pepper, half a lemon to taste
2ozs grated emmenthal.
Method:
First place the uncooked lobster tails in a pan with the white wine, bring to the boil and simmer for 3 to 5 minutes or until the shells have gone pink. Remove the lobster tails and keep the liquid to one side. Remove all the flesh from the the cooked lobster and the lobster tails, making sure you keep all the shell…especially the head! To do this you can use a variety of implements ranging from nut crackers, skewers and hammers! Of course, you may be lucky enough to have proper lobster claw cracking implements, but we aren’t that fancy and anyway, mole grips are multi functional! You will end up with a bowl of delicate, delicious flesh.
In a heavy frying pan melt half the butter and oil, when sizzling add all of the lobster debris, trust me there will be a lot of debris! Fry on high for a few minutes until it starts to brown. Now add the shallots and fry for a further 4 to 5 minutes. Add the brandy to de-glaze the pan and then add the reserved wine from cooking the lobster tails and the chicken stock. Add the tarragon and chervil. Bring to the boil and simmer for 20 to 30 minutes or until the liquid has reduced to about a third of its original size (check by tasting to see if it’s reduced enough, it should be delicious).Remove the lodster shells from the pan, making sure you have extracted as much juice from them as possible. Add the cream and the mustard and put to one side . Add salt, pepper and lemon juice to taste. You can add a teaspoon of tomato puree if you want to enrich the colour. In another frying pan, over a medium heat place the rest of the butter and add the chopped lobster flesh, and saute for only 2 to 3 minutes or until heated through. Add the lobster meat and chopped parsley to the sauce and make sure it is thoroughly combined. Put in to individual oven-proof pots and grate just a little emmenthal on the top of each. Place under a very hot grill for a few minutes only (don’t want to over-cook that delicious lobster) and serve immediately. If you wanted to bulk this out for a main course you coudl add cooked mussels and scallops to the lobster meat which would be delicious. Also I’m toying with the idea of adding a puff pastry crust…as far as I’m concerned there is very little in this world that doesn’t work well in a pie….
Inspired by Richard Burns who cooked an amazing confit of duck for us a few weeks ago, I have been determined to add something difefrent to our Christmas menu this year and decided that a side dish of goose confit was exactly what was needed to enhance our turkey experience.
Challenge One: Where do you find a goose 4 weeks before Christmas? Easy, I thought just nip to Waitrose or one of our lovely local butchers. Wrong! Apparently no-one ever buys a goose unless it’s the week before Christmas, how mad is that? Anyway, eventually a rather lovely organic frozen goose was found in a long-lost corner of Marlow Waitrose freezer department (Well done, Katy intrepid shopper and frozen goose forager!)
Chopping up a rather reluctant and large goose was by no means an easy feat, I felt like I had done several rounds with the goose by the end of it, and I think it was definitely ahead on points. Nevertheless, I ended up with the breast cut in to 4 portions, 2 legs, and 2 thighs. the wings really were a little meat-free to use, so I decided that they would be better used for the stock I planned to make. I looked at many sources for a good recipe and in the end came up with a hybrid of my own. Note of caution, John Torode fans, his recipe for confit states 100g of salt, which is FOUR times what all the other recipes suggest. Be warned!
So here is the concoction I came up with : For the confit: Take the legs, thighs and breast of a goose.For the marinade: 25g of rock salt, 1 teaspoon of ground cumin, 1 teaspoon of ground coriander, 4 juniper berries,4 cardamom pods and 6 garlic cloves. 1 small bunch of thyme, rosemary and sage For cooking: 1 head of garlic sliced in half, 2 bayleaves, 10 peppercorns, 2 tins of goose fat. For the sauce: rest of the goose, 1 chopped onion,1 pint of chicken stock, 1/2 glass of dry white wine, 1 tablespoon of butter.
Method: Place the salt, cumin, coriander, juniper berries, cardamom pods and garlic cloves in to a pestle and mortar and grind until the whole spices have been crushed. Place the goose pieces into a large tupperware container, rip up the fresh herbs and then scatter them along with the salt, garlic and spice mixture all over the goose, making sure it is well rubbed in. Place in the fridge for at least 24 hours. The next day, wipe the marinade off with some kitchen towel and place in a heavy casserole dish with a lid and add the halved garlic and the peppercorns and the goosefat. Place in a very low oven, Gas Mark 3, 140 degrees C (fan assisted), 160 degrees if not. I like my mine nearly falling off the bone, so I cooked this goose for nearly three hours, you can cook it for less if you like. Whilst it is hot, pile it into a large kilner jar, or even a pudding basin and make sure the goose pieces are completely covered in the fat. Allow to cool and then place in the fridge, where it will stay good for several weeks. I place any additional goose fat into jam jars to use for my roast potatoes, goose fat can be re-used many times. When you are ready to use your goose, dig out the pieces from the jar and place them in a roasting pan in a hot oven Gas Mark 6, 200 degrees C/180 fan assisted fro 30-4o minutes until the skin is looking crispy and browned. Serve with the reduction below.
Meanwhile the day before, I had placed what was left of the raw goose, including into a roasting pan with the chopped up onions, and had roasted it on Gas Mark 4/electric 180 degrees C/160 fan assisted for 90 minutes. I then placed it in a large saucepan, added the chicken stock and left it to simmer for 2 hours (the smell of the cooking drove Lily, the dog mad, picture above just because she’s so lovely). I then strained it, and have frozen the stock to be reduced with white wine on the day, with a little butter whisked in to it to make a wonderful reduction that will taste amazing with the goose. You can add some cranberry sauce if you’re feeling festive.
Simples! Watch out next week for the lobster ravioli with the champagne pearls…
I often ask myself whether I am a competitive person, and whilst I would probably answer “No”; everybody who knows and loves me would fall off their chairs laughing and recount many tales of my cheating at Scrabble, Monopoly….oh, the list goes on. All spurious lies of course, they are just bad losers! However, one of my most fun and definitely entertaining current competitive pastimes (rivalled only by The Court Drive Tomato competition) has been the Cooking competition I have been having with two other friends who are no amateurs in the kitchen. The deal is that we take it in turns to host a dinner party every few months, pretend none of us are doing any preparation or work whatsoever, whilst secretly scouring the pages of every cookbook known to man, and then effortlessly (supposedly!) produce a multi-course extravaganza to try and out-
Richard - currently in poll position
do the last chef’s efforts. Generally served with a nonchalant shrug of the shoulders and a well-hidden sense of relief. Well, the stakes ahve indeed been raised as our visit to Richard and Lisa’s was an absolute feast. Check this out….oh dear, my turn soon, where is Delia when you need her??
Richard (and Lisa’s) Hot, smoking dinner party
We started with some of Richard’s delicious smoked trout (recipe to follow) but here are the recipes for the main course and dessert.
Duck 3-ways – Richard’s recipe
Duck cooked three ways
Hot smoked duck breast.
I like to make this in batches and freeze it. It’s great hot or cold with a celeriac remoulade or orange dressed salad. You will need: 6 duck breasts, 1 good pinch of black pepper, 1 good pinch of salt, 2 tbsn of olive oil.
Method.: Light the BBQ. in advance. Rub the oil, salt and pepper into the duck and leave in the fridge covered for 30 mins. After the 30 mins pat dry with some paper and place into a hot smoking pan suspended above some wood chips. Heat on full heat on the bbq for 30 mins. If you are going to eat it cold place in a sealbale plastic bag and immerse immediately into iced water (to stop cooking processes) for at least 10 mins or serve warm as is. Leave them in the bags freeze it. To serve from frozen, defrost naturally, and still in the bag immerse in boiling water for a maximum of 10 mins. Carve it and serve.
Celeriac Remoulade.
This is a basic coleslaw with a difference. It can be made a day in advance but is always better the same day. You will need:1 Celeriac, Mayonnaise (home-made if you’re feeling fancy!), Anchovies (smoked if you can find them), Caper, Dijon Mustard, some Cornichons, Sweet Silverskin Pickled Onions, Salt and Pepper to taste.
Method: Finely chop the capers, anchovies, cornichon, pickled onions. Grate the celeriac and place in a non metal bowl. Combine the mayonnaise and the chopped capers, anchovies, cornichon, pickled onions and dijon mustard. Combine the Celeriac and the mayonnaise mix together. You will note there are no measures in this remoulade recipe. This is because you should taste as you go getting it just right for you. Season with the salt and pepper.
Cured Duck Breast with Pickled Ginger and Chilli Dressing
It is nearly impossible to buy cured duck in the UK but it is so nice and so easy to make.
Salt cure for 6 duck breasts¾ teaspoon freshly ground black peppercorns, ¾ teaspoon of freshly ground coriander seeds., 1 ½ teaspoons of fresh thyme leaves, 3 bay leaves, 75 g salt, 60 g sugar
Method.Combine the pepper, coriander, thyme and bay leaves into a mortar and pestle. Grind them one more time. Then add the salt and the sugar. Now take 6 duck breasts, pat them dry with paper, coat the breasts with the cure and place in a non metallic bowl. Make sure each breast is completely coated and poor any excess cure mixture into the bowl. Cover with cling film and place in the fridge to cure. I like mine quite strong so recently cured them for 26 ½ hours. If you want a more subtle flavour I recommend a minimum of 12 hours. I suggest you read the whole recipe first as if you like a more subtle cure you may want to make the dressing first. After the duck has cured remove from the bowl and wash off all the cure. Place in a glass ovenproof dish with 300 mls of tepid water. Then place in a preheated oven at 160 deg C for 20 mins. Carve lengthways and serve with the dressing. Great hot or cold.
For the Pickled Ginger and Chilli dressing. This makes a tangy dressing that really cuts through the cured duck., 110g fresh Ginger., 1 ½ chillies (not too hot)., 40g sugar, 300 ml white wine vinegar, 6 juniper berries, 1 cinnamon stick.
Method.:Peel the ginger and slice it into matchsticks. Thinly slice the chilli. In a small bowl or jar combine the ginger and chilli with 1 teaspoon of salt and set aside. Pour the vinegar, remaining salt, juniper berries and cinnamon stick into a pan and bring to boil. Once the pan has boiled for 5 mins add the ginger, chilli salt mix you reserved earlier. Turn off the heat and cover allowing to cool. Place on a shelf in the kitchen for 24 hrs.
Confit of Duck.
This is a real winter favourite in my family. Served with either a red wine bean and chorizo stew or with an orange dressed salad. Everyone thinks confit of duck is hard to make. Nothing could be further from the truth! If stored correctly will keep in a shelf in the garage for 3 months or in a fridge for 6 months. It is simply the original fast food, for those days when you don’t want to spend ages in the kitchen. I make mine in batches of 6 in advance, I deliver a roasted duck leg that is tender and moist in 20 mins from the fridge. You will need: 6 duck legs, 40 g of salt flakes, 1 good pinch of freshly ground pepper, 2 tspns fresh thyme leaves, 6 cloves of fresh garlic (crushed), 1 tablespoon of olive oil., 3 x 300 ml tins of goose fat.
Combine the thyme, salt, pepper, garlic and olive oil in a small bowl. Smear the mixture (known as “the cure”) all over the duck legs and place in a non metallic bowl. Cover with cling film and place in the fridge for 12 hrs. After 12 hrs take the duck legs out of the fridge, preheat the oven to 160 deg C. Place the duck legs into a roasting pan, leave the cure on the duck legs it adds flavour. Here you must be careful, as the more space left in the pan after the duck legs are in it, the more goose fat you will need. Now pour into the pan the goose fat making sure you cover the duck legs. Place in the oven for 1 hr and 15 mins. If you intend to store your confit, have a clean non metallic container with a lid ready. Allow the pan to cool for 5 or 10 mins. Then using tongs remove the duck legs (careful the fat will still be hot) and pack them into the container. I use a tupperware container with a locking lid. Once packed pour the goose fat over the duck legs. Ensure you fully cover the legs in goose fat. Place the lid on the container and store. To warm up simply remove a duck leg and place it on a roasting tray in an oven heated to 150 deg C for 15 mins.
Orange Dressed Salad: A simple salad the cuts through the fat of duck especially confit. It takes 5 mins to make. But the dressing is better made earlier the same day. You will need: 1 bag Watercress, A good pinch of salt, A good pinch of pepper3 oranges., ½ glass of orange juice, Olive oil
Salted Caramel Chocolate Tart -(Serves 8) – Lisa’s recipes
1 x quantity sweet shortcrust pastry, enough for a 23cm diameter, 3cm deep tart tin
For the caramel: 225g caster sugar, 100g cold butter, cubed, 100ml double cream, 1 heaped tsp sea salt flakes
1) Heat the oven to 180dec C (170 fan oven), gas 4. Thoroughly butter a 23cm x 3cm deep tart tin. Roll out the pastry to no more than 5cm thickness, put into the tin, prick the base all over with a fork and put in the freezer for 10mins.
2) Remove the pastry from the freezer, and line with tin foil and baking beans. Blind-bake in the oven for 15-20mins. Take out of the oven, remove the beans and foil, brush the pastry with a little beaten egg, and put back into the oven for another 3-5mins until golden. Remove and set aside.
3) Put the sugar and 75ml water into a pan over a low heat to dissolve. Then add the butter and keep stirring to melt. Once melted turn up the heat, and leave to bubble away for 15-20mins until it has turned to a light toffee colour, stirring occasionally. Mix in the cream and sea salt, and boil for a further 3-5mins until slightly thickened. Allow to cool.
4) Gently melt the butter and chocolate in a bowl over a pan of simmering water, stirring now and again. Whisk the sugar, eggs and egg yolks until thick and creamy. Once the chocolate and butter have melted, leave to cool for 1min then add to the sugar and egg mixture, whisking until glossy.
5) Spread the caramel over the pastry base, and carefully spoon over the chocolate mixture, spreading evenly. Bake for 20mins or until almost set but still wobbly. Allow to cool in the tin before serving.
Serve with a berry coulis (I made raspberry and blackberry) and crème fraiche.
To follow with coffee:
Bramble Marshmallows (from “Good Food Magazine) Makes about 50
1) Line a 20x30cm tin with baking parchment. Mix the icing sugar and cornflour together in a bowl and dust some of it onto the parchment. Dissolve the gelatine in 150ml hot water in a heatproof jug.
2) Put the granulated sugar and liquid glucose into a pan with 200ml water, and dissolve. Then turn up the heat and boil until it reaches 125deg C on a sugar thermometer (firm ball stage). While this is boiling, beat the egg whites with an electric whisk until stiff.
3) When the syrup is ready, pour onto the egg whites in a steady stream and continue whisking, and also add the vanilla extract. Continue whisking for around 10mins until the mixture is very thick and glossy.
4) Pour half the mixture into the tin, and scatter the blackberries over. Then add the other half of the mixture and smooth. Cover with clingfilm and leave to set in a cool place for at least 2hrs. Best eaten within 48hrs.
Chocolate & Nut Fudge
Makes about 50
Depending on how rich you want the fudge, alter the ratio of dark:milk chocolate, this ratio is very rich!
250g plain chocolate, finely broken up, 100g milk chocolate, finely broken up, 350g tin condensed milk, 1tsp vanilla extract, Your choice of nuts (I used macadamia)
1) Line a 15x23cm tin with baking parchment. Put the chocolate and condensed milk into a heat-proof bowl and melt slowly over a pan of simmering water. Stir occasionally.
2) Stir in the vanilla essence and empty into the tin. Level the surface and sprinkle on the chopped nuts, pressing them lightly into the fudge. Cover and chill until firm, around 3hrs. Can be kept for upto 1month.
(N.B. Lisa’s recipes are from the “Good Food Magazine”.
It’s raining, it’s gloomy and even worse…it’s cold! I need cheering up! They say chicken soup is good for the soul, I am sure a lot of things are good for the soul, but forget about meditation and living an exemplary life,I am going to go along with the humble mushroom, those fabulous versatile little fungi.
This soup can be as simple as you like, after all you know that I believe strongly that there is a place in society for Campbells (aka Batchelors) Condensed Mushroom soup,as it does make the base for a quick sauce, but why not make your own? It’s so easy!
You can do the quick simple version OR you can make it fancier and put foamed cream and truffle oil on top and serve it with a herb and garlic bruschetta for a dinner party. Anyway, here is the basic recipe.
You will need: 500g of mixed mushrooms – any type you want-washed and sliced, 100g of butter divided in to two 50g portions, 1 large or 2 small mild, white onions (Don’t use red onions, they go a sludgey grey colour), chopped, 2 cloves of garlic, crushed. 1 litre of strong chicken stock (use vegetable stock if you prefer, or if this is for a dinner party, substitute a quarter of the stock with white wine.) 1 tablespoon chopped, fresh thyme, 1 bayleaf, 4 tablespoons of double cream, salt and pepper to taste.
Method: Place 50g of the butter, the chopped onion, bayleaf, thyme and garlic in to a large saucepan and cook on a low heat for 5 to 10 minutes until they are soft and translucent looking but do not let them start to go brown…this is called sweating! Add the chopped mushrooms and cook for a further 5 minutes. Add the stock and bring to the boil, then reduce to a simmer for a further 20 minutes. Take out a few of the chopped mushrooms and place on one side to use as a garnish. Then either place the mixture in to a food processor and blend or use one of those lovely hand held blenders straight in to the saucepan to liquidise your soup. Taste and season according to your preferences. At this point, you can place it in the fridge and heat it up later if you want to, or freeze it. When you’re ready to serve, heat it until boiling, then whisk the remaining 50g of butter in to the soup, remove from the heat and place in to bowls, add a small amount of cream on top of each bowl and some of the reserved mushrooms.
(If you don’t want your arteries to fur up instantly, omit the additional butter and cream and use low-fat creme fraiche instead.)
If you are serving this for a dinner party, I like to foam the cream using my espresso machine and serve the soup in capuccino cups, then add a few drops of truffle oil on top of the hot cream foam and a few chopped chives or parsley.
If you want to serve your lovely soup with some bruschetta, mix some softened butter with crushed garlic and chopped fresh herbs (a little bit of chopped red chilli is nice, too). Take a part baked baguette and slice thinly. Spread the butter mixture on top of the baguette and bake in the oven for 10 to 15 minutes at the recommended heat, or until the bruschetta are crispy and browned.
I was inspired by our recent visit to the Waterside Inn to cook duck…..well that and the fact that they had crown of duck on special offer at Sainsbury’s – £5, a bargain! It is fantastic that you can buy this nifty little chap, which is virtually just the breast with the wing tips so cheaply these days. I do bemoan the loss of the legs as I adore a nice confit, but this is a quick hit, so we can save the confit for another day. I am cooking my crown of duck with maple syrup and whisky marmalade (the whisky is optional). You will need 1 crown of duck for 2 people. First of all, pre-heat the oven to 190C/170C for a Fan oven, Gas mark 5. Then place the crown in a large frying pan, and cook skin side down for a couple of minutes until the skin is brown, place the duck in a roasting try and drizzle a least 2 tablespoons of maple syrup over the breast, roast for 45 minutes, whilst this is roasting mix 2 tablespoons of chunky seville marmalade with 1 tablespoon of whicky, take the duck out and smear the marmalade mixture all over the duck, place back in the oven for 30 minutes (or 40 if you don’t like your duck pink). Take out of the oven and do rest it for 10 minutes before serving (the duck, not you, although a glass of red wine and your feet up is always nice!). I love this served with new potatoes and mint butter and green peas.
Big thanks to Pete Russell for the following article. Pete is a fellow foodie and now resident in California we will be looking to him and the lovely Linda for lots more New World items. Read on….
Another Pleasant Valley Sunday.
To be truthful, for Pleasant Valley read Tri-Valley, that area bounded by California’s Central Valley to the east and the Diablo Range Segment of the mighty Pacific Mountain System to the west, and centered on the only gap in the Diablo Range, about 20 miles east of San Francisco. So what was pleasant about our Sunday? We had considerable success with our new 3-burner BBQ grill, no mean feat considering the wind that whistles through that gap on its way from the great Pacific Ocean to the Central Valley, California’s (and the USA’s) major growing area. You see, our previous outdoor grill struggled to overcome the wind chill of the area, and we’d all but given up cooking outdoors.
So armed with French Sherberts, we set about creating Fire-Roasted Garlic-Herb Chicken. The Chicken is moistened inserting a herb butter between the flesh and the skin, basted with a roasted garlic paste, and cooked on the BBQ grill using the indirect heat method. We partnered the Chicken with Roasted Summer Vegetables and Creamy Parmesan Orzo. The proper Chefs amongst you will now be able to repeat our success, but for ordinary mortals (like ourselves), here’s what you do to prepare a meal for two.
Firstly, to ready yourself for your ordeal, construct your French Sherbert. Take equal quantities of gin, cointreau, freshly squeezed orange and freshly squeezed lime juices, pour into a cocktail shaker with about 6 larges cubes of ice and shake aggressively for about 15 to 20 secs or until your arm falls off. Strain into a 5oz cocktail glass and garnish with segment of lime. I use a 1oz (30ml) pour, so that makes 4oz of cocktail which fits nicely in the 5oz glass. This cocktail produces a fresh tingle on the tongue reminiscent of lemon sherbert, and according to an acquaintance, is ‘fabulous, I could drink buckets of it’. Freshened by the Sherbert, the prep can now begin. For the roasted garlic paste, about 120ml, you’ll need: 2 heads of garlic, 2 tablespoons of olive oil, 1 tablespoon sugar, 1 teaspoon of kosher salt (oi-vey) (Not sure we can get this, Pete, is ordinary salt ok?), a child’s handful of chopped fresh flat-leaf parsley, ground black pepper, pinch of cayenne pepper, 3 tablespoons water.
Preheat an oven to about 400F.
Trim the pointed ends of the garlic heads until all or most of the cloves are exposed, usually about a quarter down the head. Place the heads, cut side up on about a 6 inch square of aluminum foil and top with a little of the oil. Wrap the foil around the garlic so that it is completely enclosed.
Place near the middle of the oven and cook for 35 to 40 mins.
Unwrap and allow to cool for 10 minutes or so.
Cut the whole heads in half, lengthwise and squeeze the roasted garlic from their skins.
If the Sherbert has gone to head, good quality roasted garlic cloves or puree is available in most good supermarkets.
Now, mash the roasted garlic with a fork, adding all the remaining ingredients.
Put aside to be used later to baste the chicken.
For the provencale herb butter, assemble:
1 tablespoons dried basil
1 tablespoon crushed fennel seeds
1 tablespoon dried thyme
1 teaspoons garlic salt
1 teaspoon crushed, dried rosemary
1/2 teaspoon ground black pepper
1/2 teaspoon ground, dried orange peel
1 tablespoon softened, salted butter.
Mix all the herbs together in a bowl and mash 1 tablespoon into the softened butter. Set both the remaining rub and the herb butter aside to use with the chicken.
Finally, for the chicken you’ll need:
1 fresh chicken, cavity excavated, about 3.5 to 4 lbs
1 tablespoon vegetable oil
2 tablespoons fresh rosemary or thyme leaves
an instant read thermometer to check doneness of the chicken.
Preheat the BBQ grill to 350F using the outside burners. You’ll be cooking using the indirect method so be sure that you have at least 1 burner unlit. Of course, it the weather is inclement, you can use an indoor oven.
Separate the skin from the breast and the legs of the chicken by gently inserting an index finger under the skin at the neck end. By gently moving your finger around, separate the skin from the meat. Gradually ease your whole hand under the skin, loosening the skin from the breast legs and drumsticks.
Spoon the herb butter evenly under the skin by rubbing the skin to spread the butter. Spoon the remaining rub into the chicken cavity and rub it all around the walls.
Tie the chicken legs together with kitchen twine, and rub the vegetable oil onto the outside of the chicken.
Mix the garlic paste and fresh herbs into a bowl and put aside.
You’ve completed all the chicken prep now, and the grill should be at the or about 350F, so you can go ahead and cook the chicken:
Brush the grill grate and coat with oil. Remember, this is grill grate with no burner lit beneath it.
Place the chicken on the grill over the unlit burner and cover the grill. Set a timer for 40 mins. Note that the chicken will be done when an instant read thermometer, inserted into the thickest part of a breast, reads 170F; this should be in about 60 to 75 mins.
Dependant upon how confident and macho you’re feeling, you may wish to take this opportunity to mix another French Sherbert, however, the side dishes do now need attention!
When the 40 min timer expires, start basting the chicken with the garlic/herb paste and start the orzo. Baste chicken again after a further 10 mins.
When chicken is cooked (170F in middle of breast), remove chicken from grill, cover with foil and leave to rest for 15 mins. Leave 1 grill burner on and start cooking veggies.
When chicken is rested, carve and serve with the veggies and orzo.
For the grilled summer vegetables you’ll need:
1.5 lb assorted summer veg, cut into 2 cm (between 1/2 and 1 inch) cubes. Choose from summer squash, courgette/zucchini, red onion, red/yellow peppers, etc.
1 tablespoon olive oil.
salt & pepper, a grill wok (see picture).
Coat the vegetables with oil and season with salt & pepper. I fond this easiest by placing all the ingredients into a plastic freezer bag and shaking it until the veggies are coated. Set aside until needed.
While the chicken is resting, coat the grill wok with oil, empty the veg into wok and place on a grill grate over an active burner at cook for 15 mins.
Remove and serve with chicken and orzo.
For the orzo: (for those like me who said “What the *** is orzo?” it is a very fine pasta, looks a bit like pearl barley!)
1/2 tablespoon butter, 100g orzo
160 ml chicken stock
160 ml water
15g grated Parmesan
1 tablespoon fresh chopped basil
salt & pepper, 2 teaspoons toasted pine nuts.
Heat the butter in a medium saucepan over a medium heat.
Add orzo, cook for 3 mins, stirring constantly.
Stir in stock and water, bring to the boil.
Reduce heat and simmer until liquid is absorbed and orzo is done, about 15 mins.
Remove from heat, stir in parmesan, basil, salt & pepper.
Sprinkle pine nuts over and serve with chicken and veggies.
We had a bottle of local (Livermore Valley) 2004 zinfandel which was soft enough not to overpower the orzo, but robust enough to counter the roast garlic chicken and veggies. You should have enough chicken left over for a chicken Caesar salad lunch for two, and two Nigella chicken pies.
Thanks Pete, you might have enough left to make my chicken and ham pot pie recipe to follow this week as an homage to The Archers veal and ham pie. You can follow Pete on his own blog site http://russep3.tumblr.com/ for more of his excellent commentaries and recipes
Contact me, guest bloggers for your moment in the sun….you know you want to
You don’t need implements of torture to cook this impressive little dish, it is great for supper and also good for a dinner party, but do remember to check with your guests how they like their lamb cooked, as not everyone likes it pink in the middle. Cooking in the heats of the “Good Housekeeping Cook of the Year” contest a few years ago, there was an appalling woman, who snuck around trying to sabotage everyone else’s food so much that she forgot to put on her own oven and served virtually raw rack of lamb. She tried to cover it up by saying that was how she liked it and ate a chop to demonstrate in a Twilight sort of way, but no-one believed her – cheats never prosper – well not unless they’re playing Monopoly.
Anyway….all you need for this is…. a rack of lamb, approximately 6 to 8 chops, if much bigger take care to adjust the cooking time, 2 large tablespoons of mint jelly and that’s it! pre-heat the oven to Gas Mark 6, 200C/180 fan. Place the mint jelly in a large frying pan over a medium heat, as the jelly starts to melt, place the rack of lamb in the pan, and baste with the jelly as it starts to caramelise, keep doing this for about 5 minutes until the whole of the rack of lamb is covered in a lovely gooey sauce. Remove the lamb and scrape the rest of the sauce over it and place in an oven proof dish in the pre-heate dovern for 25 to 30 minutes . You will need to check on the weight and size of your joint for exact cooking times, but this should give you nice pink chops with a lovely caramelised, brown outside. Serve with any of your favourite vegetables. How easy was that? This works for lamb fillet but has a much shorter cooking time. You can also vary the jelly, it is wonderful with redcurrant and also with chilli jelly, recipe for home-made jellies coming next week., get your jelly bags ready
 Yes, it’s happened again. There they were looking fresh, yellow and appealing and overnight they turned from innocent fruit in to guilty, squashy criminals that could not be tolerated.
 For the soufflé:


